Flex - 동적으로 컴포넌트 생성
Flex Button Sample
<?xml version="1.0" encoding="utf-8"?>
<mx:Application xmlns:mx="http://www.adobe.com/2006/mxml" layout="absolute">
<mx:Button x="29" y="27" label="Test" id="test" enabled="true" click="OnClickTest(event)"/>
<mx:Script>
<![CDATA[
import mx.controls.Alert;
function OnClickTest(event:Event):void
{
Alert.show(event.toString());
}
]]>
</mx:Script>
</mx:Application>

루비 설치 하기
a. Download (1.8.6-26 Final Release)
아래 사이트에서 최신 버전을 받을 수 있습니다.
http://rubyforge.org/frs/?group_id=167
b. install
ruby186-26.exe 실행
2. MySQL 설치 하기
a. Downoad (mysql-essential-5.0.51b-win32.msi)
http://mysql.com/downloads/mysql/5.0.html
b. install
mysql-essential-5.0.51b-win32.msi 실행
3. Flex 3.0 설치 하기
a. install
\Windows\FlexBuilder_Standalone.exe 실행


Flex - SOAP 관련 링크 정보
성공하면 정리해서 다시 올리겠습니다.... ^^
(언제 성공하려나....)
Develop Web services clients with Macromedia Flex
http://www.ibm.com/developerworks/webservices/library/ws-macroflex/
Review: Macromedia Flex SOAP
http://javaboutique.internet.com/reviews/macro_flex/
mx.rpc.soap.Operation (Flex™ 2 레퍼런스 가이드)
http://flexdocs.kr/docs/flex2/langref/mx/rpc/soap/Operation.html
mx.rpc.soap.SOAPHeader (Flex™ 2 레퍼런스 가이드)
http://flexdocs.kr/docs/flex2/langref/mx/rpc/soap/SOAPHeader.html
Flex SoapHeader를 첨가한 WebService
http://www.cnblogs.com/mobile/archive/2007/02/01/636856.html
Flex 와 .Net ASP 간의 WebService
http://dev.yesky.com/265/3418765.shtml
Flex 와 Java XFire 간의 WebService
http://www.flexcoders.cn/showtopic-1011.aspx
Codehaus XFire - Home
http://xfire.codehaus.org/
Chapter 17. Spring을 사용한 원격(Remoting)및 웹서비스
http://openframework.or.kr/framework_reference/spring/ver1.2.2/html/remoting.html
Korean Groovy SOAP
http://groovy.codehaus.org/Korean+Groovy+SOAP
Flex - Ant 로 컴파일 하기
출처
http://adobe.bloter.net/tt/adobe/23
http://www.adobe.com/kr/devnet/flash/articles/flex_flasher_05.html
준비물
ant 1.7 (apache-ant-1.7.0-bin.zip)
: http://ant.apache.org/bindownload.cgi
Flex Ant Task (flex_ant_tasks_022607.zip)
: http://labs.adobe.com/wiki/index.php/Flex_Ant_Tasks
1. ant 설치
apache-ant-1.7.0-bin.zip 파일을 압축을 출고
apache-ant-1.7.0\bin 폴더를 path에 추가 해줍니다.
2. F;ex Ant Tash 설치
flex_ant_tasks_022607.zip 특정 폴더에 압축을 풀고
build.xml 파일에 taskdef 태그에 jar 경로를 지정해준다.
예) <taskdef resource="flexTasks.tasks" classpath="D:/dev.flex/lib/flexTasks.jar" />
3. build.xml 파일 작성
<project name="Flex Ant Tasks" default="compile" basedir=".">
<property name="FLEX_HOME" value="C:/Program Files/Adobe/Flex Builder 2/Flex SDK 2" />
<property name="swfFile" value="${basedir}/HelloWorld.swf" />
<property name="main_appliation" value="${basedir}/HelloWorld.mxml" />
<taskdef resource="flexTasks.tasks" classpath="D:/dev.flex/lib/flexTasks.jar" />
<target name="compile">
<echo>Building ${swfFile}</echo>
<mxmlc
file="${main_appliation}"
output="${swfFile}"
actionscript-file-encoding="UTF-8"
keep-generated-actionscript="true"
incremental="true"
>
</mxmlc>
</target>
</project>
4. 컴파일
ant -f build.xml

Flex - Singleton
http://www.onflex.org/ted/2007/01/singleton-in-mxml.php
Flex을 이용한 디자인 패턴증에서 Singleton을 적용한 방법입니다.
java 처럼 생성자 자체를 private로 할수는 없네요.
다시 말해 생성자를 new로 생성하면 별도의 객체가 만들어지게 됩니다.
Singleton 예)
{
public class ConnectionManager
{
private static var instance:ConnectionManager;
private var title:String;
public static function getInstance():ConnectionManager {
if ( ConnectionManager.instance ) {
return ConnectionManager.instance;
} else {
ConnectionManager.instance = new ConnectionManager();
return ConnectionManager.instance;
}
}
public function setTitle(src:String):void {
this.title = title;
}
public function getTitle():String {
return this.title;
}
}
}
new 객체 생성시
connMgr1.setTitle("a");
var connMgr2:ConnectionManager = new ConnectionManager();
connMgr2.setTitle("b");
mx.controls.Alert.show(connMgr1.getTitle() + "/" + connMgr2.getTitle());

getInstance 매소드 이용시
connMgr1.setTitle("a");
var connMgr2:ConnectionManager = ConnectionManager.getInstance();
connMgr2.setTitle("b");
mx.controls.Alert.show(connMgr1.getTitle() + "/" + connMgr2.getTitle());

Felx - DataGrid itemFocusIn
참조
http://flexdocs.kr/docs/flex2/langref/mx/events/DataGridEvent.html
DataGird에서 Item 선택시 호출되는 이벤트 처리 입니다.
DataGird 속성은 반듯이 editable="true" 되어 있어야 해당 이벤트가 호출 됩니다.
DataGridEvent 객체
| Property | Value |
|---|---|
bubbles |
false |
cancelable |
false |
columnIndex |
0부터 시작 / DataGrid의 열의 인덱스 |
currentTarget |
이벤트를 처리하는 event listener를 정의하는 object |
dataField |
null |
itemRenderer |
편집중의 아이템에 대응하는 아이템 에디터 인스턴스 |
localX |
NaN |
reason |
null |
rowIndex |
0부터 시작 / DataGrid의 행의 인덱스 |
target |
이벤트를 dispatch한 object |
Type |
DataGridEvent.ITEM_FOCUS_IN |
이벤트 등록
1. XML 속성으로 등록
<mx:DataGrid id = "grid1" editable="true" itemFocusIn="onItemFocusIn(event)">
2. 스크립트로 등록
grid1.addEventListener(DataGridEvent.ITEM_FOCUS_IN,onItemFocusIn);
이벤트 처리
public function onItemFocusIn(e:DataGridEvent):void {
var item:XMLList = new XMLList(grid1.dataProvider[e.rowIndex]);
mx.controls.Alert.show("row = " + e.rowIndex + "\nitem value = \n" + item);
}
Flex - SOAP 호출
출처
http://www.ibm.com/developerworks/webservices/library/ws-macroflex/
http://www.adobe.com/cfusion/communityengine/index.cfm?event=showdetails&postId=1821&productId=2
http://livedocs.adobe.com/labs/flex/3/html/wwhelp/wwhimpl/common/html/wwhelp.htm?context=LiveDocs_Book_Parts&file=data_access_048_3.html
http://flexdocs.kr/docs/flex2/langref/mx/rpc/soap/WebService.html
http://www.mail-archive.com/flexcoders@yahoogroups.com/msg64743.html
▶ SOAP
SOAP(Simple Object Access Protocol)에 대한 설명은 다른 사이트에 잘 나와 있으니 찾아 보세요.
여기에서는 Java로 SOAP 서버를 만들고, Tomcat으로 Web 서비스 하여, 클라이언트는 Delphi로 만들어 보겠습니다.
이와 같은 예가 외국 사이트를 찾아 보아도 별로 없더군요. 그래서 허접한 설명이지만 도움이 될까 해서 올립니다.
(기회가 되면 배열이나, Dataset도 구현 하고 싶지만 시간이 없어서...)
일부 소스와 내용은 에어콘 출판사의 차세대 자바 SOAP AXUS을 참조 했습니다.
▶ 준비물
JDK 1.4.x 이상 (http://java.sun.com)
Tomcat 4.1.36 (http://tomcat.apache.org/)
AXIS 1.4 (http://ws.apache.org/axis/)
▶ SOAP Web 서비스 설치
여기에서 JDK, Tomcat의 설치는 따로 하지 않겠습니다. 이것도 다른 사이트를 참조하세요.
1. axis-bin-1_4.zip 압축 풀기
Apache에서 받은 axis-bin-1_4.zip을 압축을 특정 폴더에 풀어 주세요. 저는 C:\SOAP\axis-1_4 에 풀었습니다.
앞으로 설명은 C:\SOAP\axis-1_4 으로 하겠습니다.
2. %tomcat_home%\conf\server.xml
아래 내용을 추가해서 AXIS 가상 경로를 추가 Tomcat을 다시 실행 시켜주세요.
<Context path="/axis" docBase="C:\SOAP\axis-1_4\webapps\axis" debug="0"
reloadable="true" crossContext="true">
</Context>
▶ Java로 SOAP 서버 만들기
아래와 내용과 같이 HelloWorld.java을 만들고, 이 파일을 C:\SOAP\axis-1_4\webapps\axis 디렉토리에 확장자가 .jws로 수정 HelloWorld.jws을 C:\SOAP\axis-1_4\webapps\axis 복사해주세요.
HelloWorld.java 파일
public HelloWorld() {
}
public String getHelloWorldMessage(String name) {
return "Hello World to " + name;
}
}
확인하기
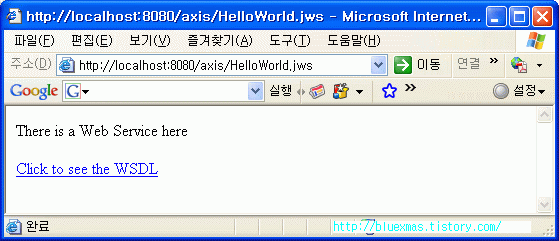
지금까지 잘 하셨다면 브라우저에서 http://localhost:8080/axis/HelloWorld.jws 주소로 보시면 아래와 같이 나올 것입니다.

▶ Flex 에서 SOAP 호출하기
<mx:Application xmlns:mx="http://www.adobe.com/2006/mxml" layout="absolute">
<mx:Script>
<![CDATA[
import mx.rpc.soap.WebService;
import mx.rpc.events.ResultEvent;
import mx.rpc.events.FaultEvent;
import mx.rpc.soap.LoadEvent;
private function on_ButtonClick(event:Event):void {
// WebService 객체 생성
var webService:WebService = new WebService();
webService.useProxy = false;
// 응답결과를 받는 Event 메소드 등록
webService.getHelloWorldMessage.addEventListener(ResultEvent.RESULT, resultListener);
webService.getHelloWorldMessage.resultFormat = 'e4x';
// SOAP 호출 실패 Event 메소드 등록
webService.addEventListener(FaultEvent.FAULT, faultHandler);
// webService.wsdl = "http://localhost:8080/axis/HelloWorld.jws?wsdl";
// WSDL 로딩
webService.loadWSDL("http://localhost:8080/axis/HelloWorld.jws?wsdl");
// SOAP 호출
webService.getHelloWorldMessage(Text1.text);
}
public function resultListener(event:ResultEvent):void {
var xmlDoc:XML = new XML(event.result.getHelloWorldMessageReturn);
// mx.controls.Alert.show(xmlDoc.text());
Text2.text = xmlDoc.text();
}
public function faultHandler(event:FaultEvent):void {
//deal with event.fault.faultString, etc
mx.controls.Alert.show(event.fault.faultString);
}
]]>
</mx:Script>
<mx:Button x="178" y="13" label="Call SOAP" click="on_ButtonClick(event)" id="Button1" />
<mx:TextArea x="10" y="10" id="Text1" fontSize="14" text="AXIS" height="25"/>
<mx:TextArea x="56" y="43" id="Text2" height="21" width="204"/>
<mx:Label x="10" y="44" text="Result :"/>
</mx:Application>
▶ 실행 결과
Programming/Flex
- Flex - 동적으로 컴포넌트 생성 2009.01.06
- Flex Button Sample 2009.01.06
- 루비 설치 하기 2008.06.23
- Flex - SOAP 관련 링크 정보 2007.10.18
- Flex - Ant 로 컴파일 하기 2007.10.09
- Flex - Singleton 2007.09.07
- Felx - DataGrid itemFocusIn 2007.08.29
- Flex - SOAP 호출 2007.08.17
